Why mark as date table in Power BI?
Mark as date table is the crucial step during the data modeling phase in Power BI, SSAS Tabular, or Power Pivot.
You often get into situations where your time intelligence functions do not provide the right results. Fortunately, most of the time, the issue is not in your Power BI DAX measure.
Now the question is then, where is the issue?
The issue is in your data model relationship when you try to search on a different online forum to find the solution to your problem. You will get the answer that you should set your date as a date table.
When you mark the date as a date table, your time intelligence functions start to work. Time intelligence functions can’t work without a date table.
When marking a date as a date table is not required.
When you create a relationship between dimension and fact tables based on a proper date column, you don’t need to mark the date as a date table.
Let’s take the Adventureworks excel workbook containing sample tables that include sales, date, products, product categories, etc.
In the following example, I am creating a relationship between the Calendar table and the Sales table.
Both tables have the date column to build a relation between the calendar and sales table, as you can see below.
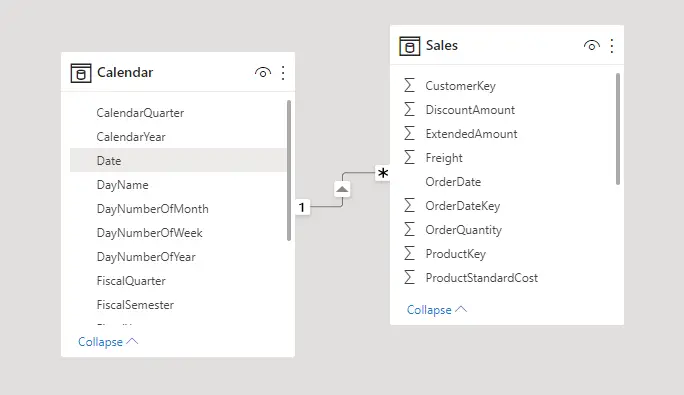
The date and order date columns in the above diagram are proper date columns.
In this case, there is no need to mark the date table because both columns are proper date columns.
When marking a date as a date table is required.
When the columns that are making a relationship between a date and a fact table are non-date columns, then we need to mark the date as date table in Power BI or the related tools.
Let’s take an example of a calendar table and a sales table. As you can see below, the columns that make the relationship between calendar and sales are non-date columns.
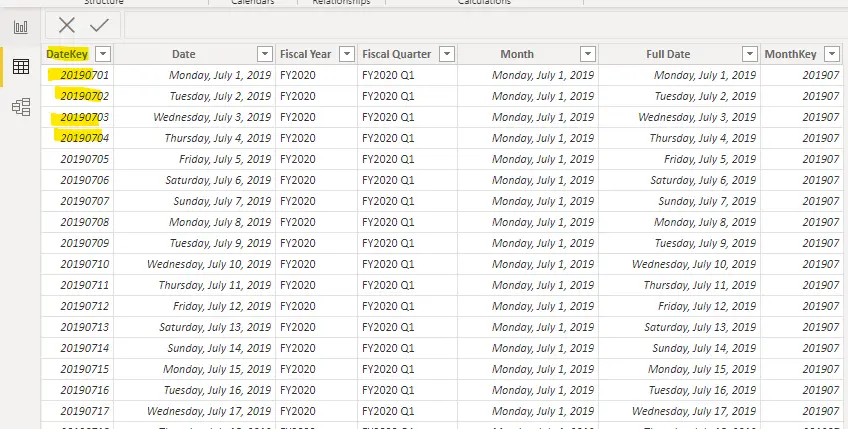
The above diagram shows that the “DateKey” column is a non-date column and the same column is available in the sales table.
We use these two columns to establish the relationship between the Date and Sales tables.
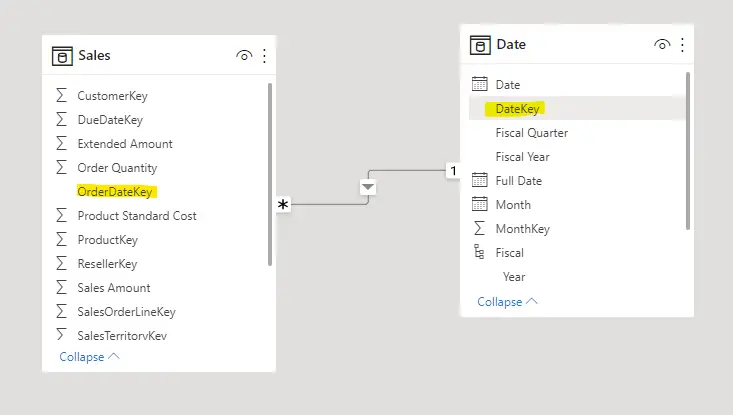
In the above scenario, we have to mark date as date table.
Step-by-step process
- Click the date table
- Select Table tools and click on mark as date table option as you can see below
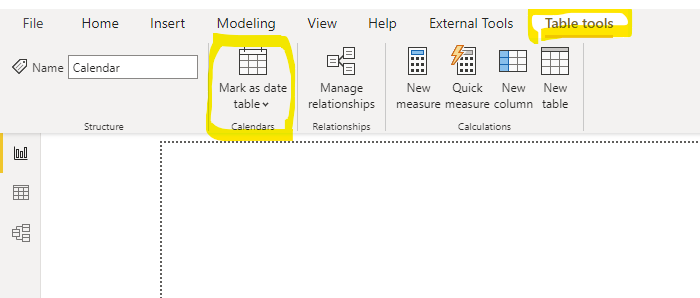
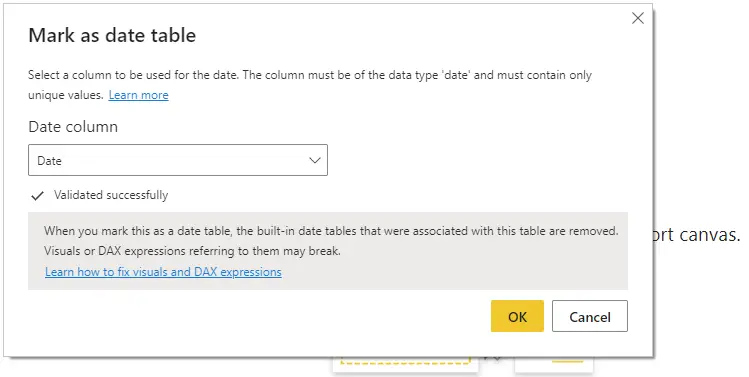
- Select the date column that you have to use in the time intelligence functions in Power BI.
- After selecting the column, you will see a message “Validated successfully.”
- Click ok and you are ready to go to create time intelligence functions.
Time Intelligence functions Example
In this example, we are using the following time intelligence functions to achieve year-to-date calculation.
- DATESYTD
- DATESBETWEEN
The syntax for DATESYTD is
DATESYTD(<dates> [,<year_end_date>]) Parameters
| Term | Definition |
| dates | A column that contains dates. |
| year_end_date | (optional) A literal string with a date that defines the year-end date. The default is December 31. |
Let’s write DAX expression for DATESYTD
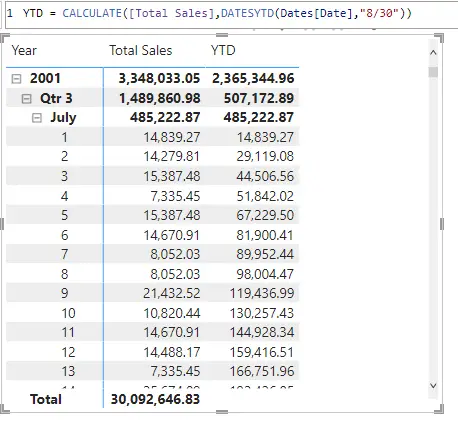
YTD =
CALCULATE (
    [Total Sales],
    DATESYTD (
        Dates[Date],
        "8/30"
    )
)
This expression will give us the running total, as you can see below.
